

Lakes and Valley CSA news week 10
Delivering to PR and DL on Tuesday, Sept 2; Dilworth and Fargo on Thursday, Sept 4th
In your boxes this week:
Bi-color sweet corn
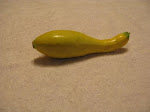
Zucchini, yellow and patty pan summer squashes
Sweet and hot peppers
Fresh basil and sage
Slicing, cherry and Roma Tomatoes
Cucumber
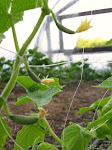
Fennel
Cabbage
Cauliflower or broccoli florets
Baby lettuce with edible flowers
Beets
Carrots
Baby Red Pac Choi with Rainbow chard, Russian kale and “dinosaur” kale
Green beans
(maybe, if there is room) New red potatoes
PR and DL: it’s your turn for tomatillos, eggs and spinach.
At this time each season, I abandon my compulsion to have a weed-free garden.
The days are too hot (or too cool) to work as feverishly as I did in June. Labor Day means it is time to focus on harvesting and canning, counting bales of hay and cows to keep.
Weeds seem to grow by chance, but Jay McCaman, in the introduction to his 1994 book,Weeds and Why They Grow, says ancient Greek and Egyptian philosophers defined chance as “the name for a law not recognized.” Emerson defined weeds as plants “whose virtues have not yet been discovered.”
The word “weed” comes from Anglo-Saxon “weod,” meaning “little herb.” Herbs are intended for healing. A chewed leaf of common Plantain, applied to a wasp sting, immediately reduces inflammation and pain. Goldenrod leaf quells the onset of an allergy attack. Chamomile soothes babies of all ages.
I track weeds in the CSA garden and welcome old, edible friends like pigweed (amaranth) and lamb’s quarter, whose presence tells me all is well. I curse hairy galinsoga (aka “icky weed”), but it’s telling me where the calcium levels are still too low in proportion to the levels of phosphous, potash and magnesium. New, unfamiliar southern Minnesota and Iowa weeds are appearing one by one, confirming that the earth is changing and I’d better be prepared.
Weeds arise to compensate for conditions in the soil, often ones that I have helped to create. Some penetrate deep into the subsoil to loosen it. The roots of leafy spurge (Euphorbia esula) plunge four to eight feel deep. Canadian Thistle (Cirsium arvense) can go as deep as twenty feet. Roots like these break up hardpan, improve drainage and aeration.
Others offer a “reading” into fertility levels. Mullein, wild daisy and wormwood indicate a need for better soil management. Velvet leaf and jimsonweed mean a major overhaul of fertility and rotation is needed (desperately). Velvetleaf thrives in anaerobic conditions. Lack of oxygen means plant residue ferments, producing formaldehyde, methane and alcohol in the soil.
Weeds are not the problem. They are Nature’s way of correcting a problem. Quoting Jay McCaman again, “The energy levels of weeds is about the same or a little higher than that of the soil on which they grow. As you learn to alter the energy level or energy pattern of your soil, you will begin to see changes in your weed populations.”
Dandelions bring calcium back to the surface of the soil. Their roots go down three feet, often to where calcium has leached. When the plant dies and decays, the calcium is released into the soil to help another crop. Carbon and other minerals are also released, improving organic matter and mineral levels. Earthworms like to follow dandelion root channels.
Foxtail says the carbon dioxide level in the soil is too high. This can be caused by working the soil too early (while it is wet). Spotted knapweed indicates acidity, poor surface drainage and lack of air in the soil. Stinging nettle improves soil aeration. (It also has healing properties that can help heart disease and clogged arteries.)
Quackgrass thrives in improper iron to manganese ratios in the soil. A single rhizome can grow as much as eleven feet long. When it dies and decays, a compound is released that kills slugs. Ragweed grows where soils are deficient in copper.
Weather plays a factor, as well. Three years of extremely dry conditions on our farm incited a riot of plume thistles where none grew before. I know the thistle roots are punching holes into a drought-tight subsoil for more desirable forage plants in the future. They are also letting air (oxygen) into the subsoil so beneficial bacteria can live and transform root hairs (organic matter) into humus.
Remedies for soil imbalances include changes in tillage practices, soil amendments and crop rotations. But first, we need to look at weeds differently, and thank them.
This week’s photos include sweet corn, fennel and a monarch butterfly resting in the determinate tomatoes.
Here are some great recipes. If you have recited to me at a pick-up site your favorite recipe, please type and email to me. I try, but too often I can’t remember them correctly by newsletter writing time.
Nancy Jones’ Glass Crock Pickles (an old-fashioned recipe, hence rather esoteric):
whole mixed pickling spice, about 1/4 cup
fresh dill, lots
apple cider vinegar 2 cup
salt 1 cup (I use somewhat less)
water 5 quarts
garlic to taste
cucumbers
Peel the cloves of garlic, no need to chop. Adjust the recipe according to your containers. Use what's on hand: I use two tall and sturdy glass vases to make my pickles and cover the vases with small plates. You may keep them on the counter; no need to refrigerate. I cut my cucumbers into spears, and they are ready within 24 hours to eat. You may put them in whole, but they will take longer to pickle.
Beth Kury's Hummus:
2 cans of chick peas and juice
2 Tablespoons olive oil (extra virgin)
1/2 cup tahini
2 Tablespoons cardamom (if whole, grind in coffee grinder; very nice)
1/2 cup fresh lemon juice
6 cloves garlic
4 teaspoons coriander
salt & pepper to taste
Other optional ingredients: a bit of cumin, paprika, dice red onion, a few toasted pine nuts, parsley. Experiment (we sometimes add some sunflower seeds for part of the tahini). Easy to make in a blender or food processor. Drain the chickpeas and reserve the liquid; add it to the blended mixture to your desired consistency.
Grilled Fennel
1 fennel bulb
3 T. olive oil
3 Tablespoons balsamic vinegar
1 Tablespoon honey
1 clove garlic, minced
2 shallot, minced
2 Tablespoons chopped fresh basil or tarragon
salt and pepper to taste
Remove stalks and outside leaves from fennel bulb. Reserve stalks for another recipe.
Cut bulb lengthwise into 1/2 inch thick slices through the narrow side.
Combine oil, vinegar, honey, garlic, shallot and basil in a large bowl. Add fennel slices and toss to coat thoroughly. Marinate for 2 hours at room temperature.
Preheat grill. When ready to cook, remove fennel from marinade. Arrange on hot grate and grill, turning with tongs until just tender, 8 to 16 minutes in all. Season with salt and pepper. Drizzle with marinade and serve.
Grilled Dilled Tomatoes
8 fresh plum (roma) tomatoes
2 Tablespoons olive oil
salt and pepper
2 Tablespoons fresh dill, chopped
Preheat grill to high. Thread tomatoes on skewers. Brush with oil and season with salt and pepper.
Place on hot grill and cook, turning as necessary until skins are charred and blistered, and flesh inside is hot and soft, 8 to 12 minutes.
Ease tomatoes off skewers with a fork. Sprinkle with dill and serve immediately.
Dagwood Provençal
1 eggplant
2 zucchini
2 yellow summer squash
2 bell peppers
1 red onion, peeled but with the root end still attached to hold onion together
Basting mixture: 3 Tablespoons olive oil, 2 Tablespoons lemon juice, 2 cloves garlic minced, 1 sprig fresh rosemary (or 1 teaspoon dried).
1 long baguette
8 ounces fresh goat cheese, at room temperature
Cut eggplant, zucchini and yellow squash lengthwise into 1/4-inch thick slices. Stemm, seed and quarter the bell peppers. Quarter the onion, leaving the root end attached.
Prepare basting mixture.
Preheat grill.
Brush vegetable slices with basting sauce using fresh rosemary sprig as a basting brush. Arrange vegetables on hot grill. Cook, turning with tongs until nicely browned, about 4 minutes per side. Baste with basting mixture while cooking. When cooked, transfer to a platter to cool. Cut root end off onion.
Cut baguette into four equal Pieces. Split each into a sandwich. Brush bottom halves with leftover basting mixture and half of the goat cheese. Arrange veggie mixture ontop next, and top with remaining cheese and top of baguette. Serve.
Fennel and Potato Gratin
1 fennel bulb, trimmed and cut into very thin slices
3 1/2 cups thinly sliced potatoes
1 teaspoon salt
pepper
1 cup heavy cream
1 clove garlic, crushed
pinch ground nutmeg
¼ cup freshly grated Parmesan cheese
Preheat oven to 400 degrees. In a bowl, toss fennel, potatoes, salt and pepper. Spread evenly in baking dish. Cover with foil and bake 1 hour.
Meanwhile, in a saucepan, combine cream, garlic and nutmeg. Heat to boiling and immediately pour over fennel-potato mixture. Sprinkle with Parmesan cheese and bake, uncovered, until golden, about 20 minutes more.
How to Grow and Cook Tomatillos: You Can't Do Mexican Without Them
You Can't Cook Mexican Without Them By Takeaways
Tomatillos (Physalis ixocarpa) are also called "ground cherry", or "husk tomato". They are a distant relative of the tomato, with a similar flower and fruit, except that the fruit is protected by a papery husk. The most common variety is the green-fruited one that becomes yellow, but occasionally you may see a variety that turns purple when ripe. These plants are essential for Mexican cooking, and a nice addition to many other recipes. They are used raw or cooked.
It is not easy to tell when tomatillos are ready to harvest because you can't see inside the husks. Size is not a clue because the mature size can be grape to golf ball size. Fortunately, they are edible at any stage. They start out tart, like a green apple, and get sweeter as they grown and ripen. The best ripeness for most recipes is a light apple green, but don't worry if you find a pale yellow one. It's still good eating. I gently squeeze the husk to see how large the fruit is. If the fruit almost fills the husk, or is splitting the husk, it's ready to use.
Storing Fresh Tomatillos -- The fruits last a couple of weeks in the refrigerator if you leave in the husk. When you are ready to cook, remove the papery husk and wash the sticky sap off the fruit with cold water.
Freezing Tomatillos -- Remove the husks, wash off the sticky coating, put in zip-close freezer bags and freeze whole for later use in sauces and stews.
To make a sauce base for freezing, simmer husked and washed tomatillos in a small amount of water (with chilis, onions and garlic if you like) until they start to pop open. Puree and freeze this mix. Thaw it and add the cilantro and spices for your salsa.
Fresh Tomatillo Salsa: Thi is the cassic Mexican salsa verde and it's easiest thing in the world. Just throw fresh cilantro, chopped garlic, green chilis, onion chunks, and tomatillos into a food processor. Run the processor until it's as smooth or chunky as you want. This is a good chip dip. If you have leftover grilled chicken or fish, stir chunks of the leftovers into the salsa and it's instant salad or sandwich filling. It is also used mixed with cooked shrimp to make shrimp cocktails.
Grilled Tomatillo Salsa: Again, use any proportions you prefer.
- Husk and wash some tomatillos.
- Put tomatillos, seeded green chilis, a couple cloves of garlic, and some big chunks of onion on a baking sheet or in a big shallow baking dish.
- Broil for about 5 minutes, turn the stuff over and broil some more. The ingredients should start to brown and get soft.
- Dump the broiled stuff into a food processor with some fresh cilantro, salt, and lime juice.
- Run the processor until it's as smooth or chunky as you want.
- Chill it if you want to.
- Add salt if you want to.
- If you hate cilantro, or don't have any, you can substitute fresh basil and call it "tomatillo pesto". It's trendy.
- If you want the sauce to look greener, add a few fresh romaine or spinach leaves, They add color without changing the taste.
Other Recipes: Slice raw ones and add to salads. Add to stews or vegetable soups.
More resources:http://www.hort.
Old Time Sweet-Sour Tomato Salad with Fresh Dill Cheese
Copyright 2008 by Lynne Rossetto Kasper
Serves 4 to 6
10 minutes prep time; 5 minutes stove time.
Straight from 19th-century American cookbooks, these big chunks of green tomatoes and ripe beefsteaks bathed in a warm, garlicky sweet-sour dressing can stand on their own, top greens or make a potato-tomato salad you can't stop eating. Bacon fat was favored in this recipe 150 years ago; olive oil works today.
My pet theory of sweet-and-sour being a universal panacea for any dish proved true when we tested this recipe with so-so red winter tomatoes.
From the same era is the idea of rolling cream cheese (homemade back then) in fresh herbs. Dropped on top of the salad, the bright green little balls are a great accent.
Cook to Cook: The dressing can be prepared up to a week ahead up to the point of adding the vinegar and refrigerated. The oil should be warm, but not hot, when the vinegar goes in; that way you won't get spattered, nor will you burn your tongue when you taste it for seasoning.
Serve the salad immediately after dressing.
Dressing:
- 1 cup cider vinegar
- 1/2 cup extra-virgin olive oil, or bacon fat
- 1 medium red onion, thin sliced lengthwise into long strips
- Salt and fresh-ground black pepper as needed
- 8 large garlic cloves, thin sliced
- 2 tight-packed tablespoons brown sugar
Dill Cheese:
- 1/4 cup tight-packed fresh dill leaves (Anne’s tip --try using basil)
- 8 ounces cream cheese
- 3 tablespoons minced red onion
- Salt and fresh ground black pepper to taste
Tomatoes:
- 2 to 3 large, delicious, ripe tomatoes (1-1/2 to 2 pounds), cut into 1-inch chunks
- 3 medium green tomatoes (about 1 pound), cut into 1-inch chunks
- 1/3 light-packed cup coarse-chopped fresh dill leaves
Make the dressing by pouring the cider into a small saucepan and boiling down to about 1/2 cup - 5 minutes more or less. Set aside.
In a 10-inch skillet set over medium heat, warm the olive oil or bacon fat. Stir in the onions, sprinkling them with a little salt and a generous amount of pepper. Saute for a minute or until the onion is softened, but not browned. Stir in garlic and cook another 30 seconds to a minute. You want to soften the garlic, but not brown it. Pull the pan off the heat and blend in the sugar to melt it. (You can set the dressing aside at this point for several hours, or refrigerate it up to a week.) Make the dill cheese by chopping the 1/4 cup dill, blending the cream cheese with the onion and salt and pepper, then creating small balls with 2 teaspoons.Roll the balls in the dill. Chill until ready to serve.
To serve, put the tomatoes into a large serving bowl. When you are ready to serve, warm up the onion mixture if needed - it should be warm, not hot. Pull the pan off the heat, stir in the boiled-down vinegar and any liquid from the tomatoes. Carefully (dressing could be quite hot) taste for seasoning and sweet-tart balance.
Pour it over the tomatoes, folding in the dill. If you made the salad with olive oil dressing, serve it warm or at room temperature. If bacon fat was used in the dressing, it's best to eat it warm. Then dot the salad with the dill cheese.thdthdht