Sunday, August 31, 2008

CSA News - August 31


Lakes and Valley CSA news week 10

Delivering to PR and DL on Tuesday, Sept 2;  Dilworth and Fargo on Thursday, Sept 4th

In your boxes this week:

Bi-color sweet corn

Zucchini, yellow and patty pan summer squashes

Sweet and hot peppers

Fresh basil and sage

Slicing, cherry and Roma Tomatoes

Cucumber

Fennel

Cabbage

Cauliflower or broccoli florets

Baby lettuce with edible flowers

Beets

Carrots

Baby Red Pac Choi with Rainbow chard, Russian kale and “dinosaur” kale

Green beans

(maybe, if there is room) New red potatoes

PR and DL: it’s your turn for tomatillos, eggs and spinach.


At this time each season, I abandon my compulsion to have a weed-free garden.

The days are too hot (or too cool) to work as feverishly as I did in June. Labor Day means it is time to focus on harvesting and canning, counting bales of hay and cows to keep.


Weeds seem to grow by chance, but Jay McCaman, in the introduction to his 1994 book,Weeds and Why They Grow, says ancient Greek and Egyptian philosophers defined chance as “the name for a law not recognized.” Emerson defined weeds as plants “whose virtues have not yet been discovered.”


The word “weed” comes from Anglo-Saxon “weod,” meaning “little herb.” Herbs are intended for healing. A chewed leaf of common Plantain, applied to a wasp sting, immediately reduces inflammation and pain. Goldenrod leaf quells the onset of an allergy attack. Chamomile soothes babies of all ages.


I track weeds in the CSA garden and welcome old, edible friends like pigweed (amaranth) and lamb’s quarter, whose presence tells me all is well. I curse hairy galinsoga (aka “icky weed”), but it’s telling me where the calcium levels are still too low in proportion to the levels of phosphous, potash and magnesium. New, unfamiliar southern Minnesota and Iowa weeds are appearing one by one, confirming that the earth is changing and I’d better be prepared.


Weeds arise to compensate for conditions in the soil, often ones that I have helped to create. Some penetrate deep into the subsoil to loosen it. The roots of leafy spurge (Euphorbia esula) plunge four to eight feel deep. Canadian Thistle (Cirsium arvense) can go as deep as twenty feet. Roots like these break up hardpan, improve drainage and aeration.


Others offer a “reading” into fertility levels. Mullein, wild daisy and wormwood indicate a need for better soil management. Velvet leaf and jimsonweed mean a major overhaul of fertility and rotation is needed (desperately). Velvetleaf thrives in anaerobic conditions. Lack of oxygen means plant residue ferments, producing formaldehyde, methane and alcohol in the soil.


Weeds are not the problem. They are Nature’s way of correcting a problem. Quoting Jay McCaman again, “The energy levels of weeds is about the same or a little higher than that of the soil on which they grow. As you learn to alter the energy level or energy pattern of your soil, you will begin to see changes in your weed populations.”


Dandelions bring calcium back to the surface of the soil. Their roots go down three feet, often to where calcium has leached. When the plant dies and decays, the calcium is released into the soil to help another crop. Carbon and other minerals are also released, improving organic matter and mineral levels. Earthworms like to follow dandelion root channels.


Foxtail says the carbon dioxide level in the soil is too high. This can be caused by working the soil too early (while it is wet). Spotted knapweed indicates acidity, poor surface drainage and lack of air in the soil. Stinging nettle improves soil aeration. (It also has healing properties that can help heart disease and clogged arteries.)


Quackgrass thrives in improper iron to manganese ratios in the soil. A single rhizome can grow as much as eleven feet long. When it dies and decays, a compound is released that kills slugs. Ragweed grows where soils are deficient in copper.


Weather plays a factor, as well. Three years of extremely dry conditions on our farm incited a riot of plume thistles where none grew before. I know the thistle roots are punching holes into a drought-tight subsoil for more desirable forage plants in the future. They are also letting air (oxygen) into the subsoil so beneficial bacteria can live and transform root hairs (organic matter) into humus.


Remedies for soil imbalances include changes in tillage practices, soil amendments and crop rotations. But first, we need to look at weeds differently, and thank them.


This week’s photos include sweet corn, fennel and a monarch butterfly resting in the determinate tomatoes.


Here are some great recipes. If you have recited to me at a pick-up site your favorite recipe, please type and email to me. I try, but too often I can’t remember them correctly by newsletter writing time.


Nancy Jones’ Glass Crock Pickles (an old-fashioned recipe, hence rather esoteric):

whole mixed pickling spice, about 1/4 cup

fresh dill, lots

apple cider vinegar 2 cup

salt 1 cup (I use somewhat less)

water 5 quarts

garlic to taste

cucumbers

Peel the cloves of garlic, no need to chop. Adjust the recipe according to your containers.  Use what's on hand: I use two tall and sturdy glass vases to make my pickles and cover the vases with small plates.  You may keep them on the counter; no need to refrigerate.  I cut my cucumbers into spears, and they are ready within 24 hours to eat.  You may put them in whole, but they will take longer to pickle.


Beth Kury's Hummus:

2 cans of chick peas and juice

2 Tablespoons olive oil (extra virgin)

1/2 cup tahini

2 Tablespoons cardamom (if whole, grind in coffee grinder; very nice)

1/2 cup fresh lemon juice

6 cloves garlic

4 teaspoons coriander

salt & pepper to taste


Other optional ingredients: a bit of cumin, paprika, dice red onion, a few toasted pine nuts, parsley.  Experiment (we sometimes add some sunflower seeds for part of the tahini).  Easy to make in a blender or food processor.  Drain the chickpeas and reserve the liquid; add it to the blended mixture to your desired consistency.


 Grilled Fennel

1 fennel bulb

3 T. olive oil

3 Tablespoons balsamic vinegar

1 Tablespoon honey

1 clove garlic, minced

2 shallot, minced

2 Tablespoons chopped fresh basil or tarragon

salt and pepper to taste


Remove stalks and outside leaves from fennel bulb. Reserve stalks for another recipe.

Cut bulb lengthwise into 1/2 inch thick slices through the narrow side.

Combine oil, vinegar, honey, garlic, shallot and basil in a large bowl. Add fennel slices and toss to coat thoroughly. Marinate for 2 hours at room temperature.

Preheat grill. When ready to cook, remove fennel from marinade. Arrange on hot grate and grill, turning with tongs until just tender, 8 to 16 minutes in all. Season with salt and pepper. Drizzle with marinade and serve.


Grilled Dilled Tomatoes

8 fresh plum (roma) tomatoes

2 Tablespoons olive oil

salt and pepper

2 Tablespoons fresh dill, chopped


Preheat grill to high. Thread tomatoes on skewers. Brush with oil and season with salt and pepper.

Place on hot grill and cook, turning as necessary until skins are charred and blistered, and flesh inside is hot and soft, 8 to 12 minutes.

Ease tomatoes off skewers with a fork. Sprinkle with dill and serve immediately.


Dagwood Provençal

1 eggplant

2 zucchini

2 yellow summer squash

2 bell peppers

1 red onion, peeled but with the root end still attached to hold onion together


Basting mixture: 3 Tablespoons olive oil, 2 Tablespoons lemon juice, 2 cloves garlic minced, 1 sprig fresh rosemary (or 1 teaspoon dried).


1 long baguette

8 ounces fresh goat cheese, at room temperature


Cut eggplant, zucchini and yellow squash lengthwise into 1/4-inch thick slices. Stemm, seed and quarter the bell peppers. Quarter the onion, leaving the root end attached.

Prepare basting mixture.

Preheat grill.

Brush vegetable slices with basting sauce using fresh rosemary sprig as a basting brush. Arrange vegetables on hot grill. Cook, turning with tongs until nicely browned, about 4 minutes per side. Baste with basting mixture while cooking. When cooked, transfer to a platter to cool. Cut root end off onion.


Cut baguette into four equal Pieces. Split each into a sandwich. Brush bottom halves with leftover basting mixture and half of the goat cheese. Arrange veggie mixture ontop next, and top with remaining cheese and top of baguette. Serve.


Fennel and Potato Gratin

1 fennel bulb, trimmed and cut into very thin slices

3 1/2  cups thinly sliced potatoes

1 teaspoon salt

pepper

1 cup heavy cream

1 clove garlic, crushed

pinch ground nutmeg

¼ cup freshly grated Parmesan cheese


Preheat oven to 400 degrees. In a bowl, toss fennel, potatoes, salt and pepper. Spread evenly in baking dish. Cover with foil and bake 1 hour.

Meanwhile, in a saucepan, combine cream, garlic and nutmeg. Heat to boiling and immediately pour over fennel-potato mixture. Sprinkle with Parmesan cheese and bake, uncovered, until golden, about 20 minutes more.


How to Grow and Cook Tomatillos: You Can't Do Mexican Without Them

You Can't Cook Mexican Without Them    By  Takeaways

Tomatillos (Physalis ixocarpa) are also called "ground cherry", or "husk tomato". They are a distant relative of the tomato, with a similar flower and fruit, except that the fruit is protected by a papery husk. The most common variety is the green-fruited one that becomes yellow, but occasionally you may see a variety that turns purple when ripe. These plants are essential for Mexican cooking, and a nice addition to many other recipes. They are used raw or cooked.


It is not easy to tell when tomatillos are ready to harvest because you can't see inside the husks. Size is not a clue because the mature size can be grape to golf ball size. Fortunately, they are edible at any stage. They start out tart, like a green apple, and get sweeter as they grown and ripen. The best ripeness for most recipes is a light apple green, but don't worry if you find a pale yellow one. It's still good eating. I gently squeeze the husk to see how large the fruit is. If the fruit almost fills the husk, or is splitting the husk, it's ready to use.


Storing Fresh Tomatillos -- The fruits last a couple of weeks in the refrigerator if you leave in the husk. When you are ready to cook, remove the papery husk and wash the sticky sap off the fruit with cold water.


Freezing Tomatillos -- Remove the husks, wash off the sticky coating, put in zip-close freezer bags and freeze whole for later use in sauces and stews.


To make a sauce base for freezing, simmer husked and washed tomatillos in a small amount of water (with chilis, onions and garlic if you like) until they start to pop open. Puree and freeze this mix. Thaw it and add the cilantro and spices for your salsa.


Fresh Tomatillo Salsa: Thi is the cassic Mexican salsa verde and it's easiest thing in the world. Just throw fresh cilantro, chopped garlic, green chilis, onion chunks, and tomatillos into a food processor. Run the processor until it's as smooth or chunky as you want. This is a good chip dip. If you have leftover grilled chicken or fish, stir chunks of the leftovers into the salsa and it's instant salad or sandwich filling. It is also used mixed with cooked shrimp to make shrimp cocktails.


Grilled Tomatillo Salsa: Again, use any proportions you prefer.

  1. Husk and wash some tomatillos.
  2. Put tomatillos, seeded green chilis, a couple cloves of garlic, and some big chunks of onion on a baking sheet or in a big shallow baking dish.
  3. Broil for about 5 minutes, turn the stuff over and broil some more. The ingredients should start to brown and get soft.
  4. Dump the broiled stuff into a food processor with some fresh cilantro, salt, and lime juice.
  5. Run the processor until it's as smooth or chunky as you want.
  6. Chill it if you want to.
  7. Add salt if you want to.
  • If you hate cilantro, or don't have any, you can substitute fresh basil and call it "tomatillo pesto". It's trendy.
  • If you want the sauce to look greener, add a few fresh romaine or spinach leaves, They add color without changing the taste.
  •  

Other Recipes: Slice raw ones and add to salads. Add to stews or vegetable soups.


More resources:http://www.hort.purdue.edu/newcrop/morton/mexican_husk_tomato.html


Old Time Sweet-Sour Tomato Salad with Fresh Dill Cheese
Copyright 2008 by Lynne Rossetto Kasper

Serves 4 to 6
10 minutes prep time; 5 minutes stove time.

Straight from 19th-century American cookbooks, these big chunks of green tomatoes and ripe beefsteaks bathed in a warm, garlicky sweet-sour dressing can stand on their own, top greens or make a potato-tomato salad you can't stop eating. Bacon fat was favored in this recipe 150 years ago; olive oil works today.

My pet theory of sweet-and-sour being a universal panacea for any dish proved true when we tested this recipe with so-so red winter tomatoes.

From the same era is the idea of rolling cream cheese (homemade back then) in fresh herbs. Dropped on top of the salad, the bright green little balls are a great accent.

Cook to Cook: The dressing can be prepared up to a week ahead up to the point of adding the vinegar and refrigerated. The oil should be warm, but not hot, when the vinegar goes in; that way you won't get spattered, nor will you burn your tongue when you taste it for seasoning.

Serve the salad immediately after dressing.

Dressing:

  • 1 cup cider vinegar
  • 1/2 cup extra-virgin olive oil, or bacon fat
  • 1 medium red onion, thin sliced lengthwise into long strips
  • Salt and fresh-ground black pepper as needed
  • 8 large garlic cloves, thin sliced
  • 2 tight-packed tablespoons brown sugar

Dill Cheese:

  • 1/4 cup tight-packed fresh dill leaves (Anne’s tip  --try using basil)
  • 8 ounces cream cheese
  • 3 tablespoons minced red onion
  • Salt and fresh ground black pepper to taste

Tomatoes:

  • 2 to 3 large, delicious, ripe tomatoes (1-1/2 to 2 pounds), cut into 1-inch chunks
  • 3 medium green tomatoes (about 1 pound), cut into 1-inch chunks
  • 1/3 light-packed cup coarse-chopped fresh dill leaves

Make the dressing by pouring the cider into a small saucepan and boiling down to about 1/2 cup - 5 minutes more or less. Set aside.

In a 10-inch skillet set over medium heat, warm the olive oil or bacon fat. Stir in the onions, sprinkling them with a little salt and a generous amount of pepper. Saute for a minute or until the onion is softened, but not browned. Stir in garlic and cook another 30 seconds to a minute. You want to soften the garlic, but not brown it. Pull the pan off the heat and blend in the sugar to melt it. (You can set the dressing aside at this point for several hours, or refrigerate it up to a week.) Make the dill cheese by chopping the 1/4 cup dill, blending the cream cheese with the onion and salt and pepper, then creating small balls with 2 teaspoons.Roll the balls in the dill. Chill until ready to serve.

To serve, put the tomatoes into a large serving bowl. When you are ready to serve, warm up the onion mixture if needed - it should be warm, not hot. Pull the pan off the heat, stir in the boiled-down vinegar and any liquid from the tomatoes. Carefully (dressing could be quite hot) taste for seasoning and sweet-tart balance.

Pour it over the tomatoes, folding in the dill. If you made the salad with olive oil dressing, serve it warm or at room temperature. If bacon fat was used in the dressing, it's best to eat it warm. Then dot the salad with the dill cheese.thdthdht
CSA News - August 23

Lakes and Valley CSA news week 9

Delivering to PR and DL Monday, Aug 25th ;  Dilworth and Fargo on Thursday, Aug 28th


In your veggie boxes this week:

Summer squashes

Basil

Cilantro or baby green onions

Dill for pickling

Lettuce with edible flowers

Radishes

Cucumbers

Cabbage

Cauliflower

Broccoli

Sweet pepper (Carmen pointed or Northstar bell)

Cherry bomb or jalapeno hot pepper

Carrots

Tomatoes

Ailsa Craig sweet onions

Fargo eggs


Coming soon: sweet corn, fennel, tomatillos, new potatoes!!!


The chickens love to eat the leaves we trim off your cabbages and cauliflowers each week. They devour zucchini that grow to the size of baseball bats between harvest days. For their staple ration, Dewane grinds homegrown wheat, barley and oats, and mixes them with organic soybean meal, salt and trace minerals. They free-choice oyster shell (more calcium makes stronger shells) and fresh water.


It is not safe to let them run free. Fox, skunks, raccoon, mink, badgers, weasels, eagles and hawks routinely patrol the garden. Wolves, coyotes, wolverines, wild cats and dogs are not far off, deterred by the electric fence and human presence. Every few days we reposition the chicken “trailers” in sweet clover and mixed grass plots that are resting from raising vegetables. The chickens learn quickly how to move with their shelters, proving that they are quite intelligent creatures.


They have protection from sun, wind and rain, but not temperature. Hot, humid weather affects them as much as it does us. We’ve been averaging 4 dozen per day, but when it’s icky and sticky, the number drops to thirty or less. Fortunately, the quality remains constant. Fresh organic farm eggs are the absolute best, in my opinion. Deep orange yolks and firm whites whip up well in any dish. Peeling a hardboiled fresh egg is difficult. I’ve experimented with various methods, like the “ice-cold plunge after boiling,” and “bring to a boil and let sit.” If I absolutely need hardboiled eggs, I buy older eggs from the grocery store.


Lack of rain, hot temperatures and wicked winds necessitate around the clock watering. One of this week’s photos shows the water reel in action. Dewane designed the garden plots and well around this device. A commercial sprinkler head, that jets water in a 50-foot circle, is attached to a flexible hose. Driven by water pressure, the water reel slowly winds up the hose, drawing back the sprinkler. A run takes 12 hours, and delivers an inch of water over a 225-foot long rectangle.


I am a reluctant tractor jockey. When we started farming, Dewane drove the tractor and I stacked square bales on the hay wagon. Joey, in diapers, rode on the wagon. By the time he was five, he could steer the tractor. As soon as he could reach the clutch, he drove. At thirteen, he could roll and tie thousand-pound bales, then move and stack them in the cow yard like a pro. No need for me to learn how to drive the tractor. I focused on gardening and cooking.


I planted, mulched, weeded, harvested and canned by hand. My garden was 30 x 120, and from it I fed well our family of five. In the fall, Dewane would plow it with the tractor. In the spring, he’d cultivate to warm up the soil. I’d find excuses to avoid using a tractor, which was silly because I drove a 63-passenger school bus. I think the reason was that I liked touching the earth.


I enjoy hand-weeding. It is meditation and accomplishment rolled up together. I can listen and think, and at the end of a row, look back and admire what I’ve done. However, as the CSA grows, and I tend more ground, I need to do so more efficiently. The tine cultivator is an amazing implement. Pulling it behind the small tractor, I can accomplish in an hour what would take thirty by hand. Once I learn how to do it.


Barbecued Cabbage from “How to Grill” by Steven Raichlen

¼ cup butter

4 strips uncooked bacon

1 small onion

1 head green cabbage

¼ cup barbecue sauce


Set up a charcoal grill for indirect grilling. Form two heat zones by raking coals into two piles at opposite ends of the grill.

Core head of cabbage. Prop up, cored end up, with a ring made of rolled aluminum foil.

Julienne uncooked bacon. Chop onion.

Melt 1 Tablespoon butter in a skillet and add bacon and onion. Cook until bacon starts to brown. Drain in a strainer and reserve the drippings. Mix with barbecue sauce and spoon into core cavity. Top with remaining slices of butter.

Baste head of cabbage with drippings.

Place stuffed cabbage on its foil ring stand in center of hot grill. Cover. Grill until cabbage is very tender, about 1 to 1½ hours. Peel off any charred leaves, cut into wedges and serve.


Grilled Tomatoes

6 ripe red tomatoes

6 cloves garlic, minced

3 Tablespoons olive oil

2 oz grated Parmesan cheese

fresh thyme leaves


Prepare grill for indirect cooking.

Cut tomatoes in half crosswise. Season with salt and pepper.

Sauté garlic in olive oil until just golden, 1 to 2 minutes. Remove from heat.

Place tomatoes cut side down on oiled, preheated grill. Grill until nicely browned, 3 to 5 minutes, rotating halfway through cooking time to sear an attractive crosshatch of grill marks. Turn over with tongs.

Spoon garlic and butter on top and continue to grill bottoms (rounded parts) until browned, another 3 to 5 minutes.

Transfer to platter and top with Parmesan and thyme leaves.


Grilled Zucchini and yellow squash

2 or 3 medium zucchini

2 or 3 medium yellow crookneck squash

1 clove garlic, minced

1 teaspoon dried oregano

1 teaspoon dried mint

½ teaspoon red pepper flakes

3 Tablespoons olive oil

Slice zucchini and yellow squashes into ¼ inch slices lengthwise. Arrange in a baking dish and sprinkle with garlic, herbs, lots of salt and pepper, and 2 Tablespoons oil. Let marinate for 15 minutes.

Prepare grill for indirect cooking.

Set zucchini slices on grill and cook 4 to 6 minutes per side, until nicely browned. Rotate halfway through for a nice pattern.

Remove from grill, drizzle with remaining Tablespoon oil and garnish, if desired, with lemon wedges.


Tip: the zucchini marinade is good also on other vegetables, asparagus to sliced eggplants to onions.


If, like me, you do not have a grill, your oven can be a good friend.


Roasted Green Beans with Dill vinaigrette

2 pounds green beans

3 Tablespoons olive oil

¾ teaspoons salt

2 Tablespoons white wine vinegar

1 ½ teaspoons Dijon mustard

½ teaspoon sugar

½ teaspoon freshly ground pepper

2 teaspoons chopped fresh dill


Preheat oven to 450 degrees. In a large roasting pan, toss green beans with 1 tablespoon oil and ½ teaspoon salt. Roast, stirring twice, until tender and lightly browned, about 20 minutes.

Meanwhile, prepare vinaigrette. In a bowl, whisk together vinegar, mustard, sugar, remaining ¼ teaspoon salt, and pepper. Beat in remaining 2 Tablespoons oil. Add dill.

When beans are done, transfer to serving dish. Drizzle with vinaigrette.


Roasted Cauliflower

1 medium cauliflower, broken into florets

1 Tablespoon olive oil

½ teaspoon salt

¼ teaspoon pepper

2 Tablespoons chopped fresh parsley

1 clove garlic, finely chopped


Preheat oven to 450 degrees. In jelly-roll pan, toss cauliflower florets with oil, salt and pepper until evenly coated. Roast until cauliflower is tender, about 20 minutes. Stir halfway through roasting.

In a small cup, combine parsley and garlic. Sprinkle over cauliflower and stir to mix evenly. Roast 3 minutes longer. Serve.


Roasted Peppers with Fresh Basil

4 large red and yellow peppers

1 Tablespoon olive oil

salt and pepper to taste

3 (or more) large basil leaves, julienned


Preheat a broiler. Cut peppers lengthwise in half and remove seeds. Arrange in a pan, cut side away from heat source. Broil until peppers are charred and blistered, about 8 minutes. Cover with foil and allow to steam 15 minutes, or until cool enough to handle. Peel off skins.  Cut peppers into ½-inch strips. Pat dry.

Place back on baking sheet. Drizzle with oil, and sprinkle with salt and pepper. Top with basil. Serve immediately, or refrigerate overnight.


Sauteed Cucumber with Dill, Parsley or Mint

3 medium cucumbers

1 Tablespoon butter

½ teaspoon salt

1 Tablespoon dill, parsley or mint leaves

pepper


Cut cucumbers lengthwise, then crosswise into ½-inch thick slices.

In a skillet, melt butter. Add cucumber and salt. Cook, stirring frequently, until cucumbers just start to brown, about 8 minutes.

Remove from heat. Sprinkle with herb leaves and pepper. Serve.


Stri-fried Cucumbers and Radishes

1 large cucumber, thinly sliced

1 ¼ teaspoon salt

1 Tablespoon oil

4 large radishes, cut in half and thinly sliced

6 to 8 Chard or kale leaves, stalks removed, then sliced into strips

1 Tablespoon hoisin sauce

1/8 teaspoon cayenne pepper


In colander over bowl, toss cucumber slices with 1 teaspoon salt. Let stand 20 minutes at room temperature. Discard liquid. Pat cucumber dry with paper towels.

In a skillet, heat oil. Add cucumber and radishes, and cook, stirring frequently, until tender, about 4 minutes. Add chard or kale, hoisin sauce, remaining ¼ teaspoon salt and cayenne. Stir-fry until leaves have wilted, about 2 minutes.


Tuscan Cabbage and Beans

1 Tablespoon olive oil

1 onion, thinly sliced

2 cloves garlic, thinly sliced

1 medium head cabbage, cored and very thinly sliced

2 tomatoes, diced, with juice

1 cup water

¾ teaspoon salt

¼ teaspoon freshly ground pepper

1 can (15 to 19 oz) white kidney beans (cannellini), drained

1/3 cup chopped fresh parsley


In a non-stick skillet, heat oil. Add onions and garlic, and saute until tender, about 5 minutes. Add cabbage, tomatoes with their juice, water, salt and pepper. Cover and cook, stirring occasionally, until cabbage is very tender, about 30 minutes. Add cannellini beans and parsley. Heat and serve.


Pickled Cucumbers or Zucchini

Cut into thin slices 2 lbs cucumbers or zucchini and 2 onions and place in a bowl. Cover with water and add ¼ cup coarse, non-iodized pickling salt. Let stand 2 hours, then drain thoroughly.

Bring to a boil 3 cups cider vinegar, 3 cups sugar, 1 teaspoon celery seed, 2 teaspoons mustard seed, and 1 teaspoon turmeric. Add cucumbers or zucchini. Remove mixture from heat and let stand 2 hours. Pack into clean pint jars. Process 15 minutes in boiling water bath, or store in refrigerator.


Pickled Dilled Cucumbers or Beans

Slice cucumbers or snap 2 pounds tender green beans. Pack into 4 clean pint jars. To each pint, add ¼ teaspoon cayenne, 1 clove garlic, 1 head dill.

Bring to a boil, 2 ½ cups vinegar, 2 ½ cups water and ¼ cup pickling salt. Pour over cucumbers or dill. Process 15 minutes in boiling water bath or store in refrigerator.


Easy Refrigerator Pickles

3 cups thinly sliced cucumbers

1 cup thinly sliced onions

¾ cup sugar

¾ cup cider vinegar

¼ teaspoon salt

¼ teaspoon mustard seed

¼ teaspoon celery seed

½ teaspoon ground turmeric

½ teaspoon ground cloves


Place cucumbers and onions in large bowl and set aside. In a saucepan, combine remaining ingredients and bring to a boil. Stir until sugar is dissolved. Pour immediately over cucumbers and onions. Cover tightly and refrigerate for at least 24 hours before serving. Yield 6 cups.


Overnight Pickled Cabbage

1 head cabbage

5 teaspoons salt

1 Tablespoon sugar

2 Tablespoons distilled white vinegar


Cut cabbage into wedges. Remove core from each section and chop into large pieces. In a large bowl, mix cabbage with salt. Then cover and refrigerate 3 hours.

Drain liquid. Add sugar and vinegar, and toss to mix. Cover and refrigerate overnight, stirring occasionally.

CSA News - August 16


Lakes and Valley CSA news week 8
Delivering to PR and DL August 18, Dilworth and Fargo on August 21, 2008

In your veggie boxes this week:
Raspberries
Zucchini and summer squashes
Basil
Radishes
Mesclun with edible flowers and late, baby peas
Green beans
Cucumbers
Cabbage
Broccoli
Cauliflower—white, orange cheddar or (coming soon) purple Graffiti
Carrots
Tomatoes, cherry and slicing
Flat leaf parsley
Eggs in PR and DL shares
Coming soon—tomatillos
Coming soon—you-pick-em green beans for canning or freezing.

Several of you have asked about ordering beef this fall. We will have no steers ready this fall. Severe drought in 2007 forced us to cull our herd to only brood cows and yearling heifers. But our friend (and former intern) Angela Michieli at Camphill Village Minnesota in Sauk Centre has six steers that will be ready. She farms biodynamically, just as we do. Her steers are presently out on pasture, and will be given the six-week grain finish that marbleizes the meat just right. Last March’s meat customers had her beef, and loved it.

The beef ordering process will be the same—using the forms that will be sent as attachments to a separate email today, reserve either a half or a quarter of beef, custom cut and wrapped. The meat will be delivered in three batches of two steers each, mid-November and December.

We will dry and bag for you now the Calendula blossoms. Their oil content is increasing with the season, and Julie, our resident herbalist, feels an electric dehydrator will ensure successful drying and future storage. Dried, the bright orange flower petals will make a sunny addition to your winter soups and salads.

Speaking of capturing summer in a jar, I hope you are putting up some of your produce. I made a batch of pesto today. Half topped a veggie-rice lunch dish. The rest went into the freezer. I also froze a few bags of broccoli. Little by little, I restock my freezer.

Each week our tomato harvest is increasing. Cherry tomatoes always come first. Our Sungolds are outpacing the red Favoritas because we lost more Favoritas in the Big Freeze. We replanted, of course, and the replacement Favoritas are now flowering like crazy. The pale yellow cherry tomatoes in your veggie boxes are Snow Whites. Very sweet, full tomato flavor, they are open-pollinated and have thin, tender skins.
We re-sowed hybrid determinate tomatoes, rather than heirloom indeterminate, after the Big Freeze. Determinates are bred to not need staking, but have been increasingly susceptible to early wilt and other fungal diseases. We wanted their concentrated fruit set, so we put a five gallon bucket of two-year old compost underneath each transplant. The plants are waist high and bushy now. Tomatoes are forming, and we’re promised more summer weather next week.

The determinate tomatoes claimed a bed we had intended for seed saving. We had already set in the two paste tomato plants that survived the B.F. The mother paste tomato volunteered in the onion bed in 2007. Even with its late start, it ripened fruits. Impressed, I saved the seed and planted it this year. I have no idea what variety it is, but it is a survivor, and worthy of protection.

I am always eager to save seed. Dewane replants his oat and barley seed each year. The oat rust fungus has all but disappeared. One year NDSU tested his oats in the lab, hoping he’d bred a rust-resistant strain over time. It turned out that was not the case, but his fields still show no rust. He feels his biodynamic practices strengthen the plants so they can resist rust. Practice, not breeding. Hmmm.

Arugula self-sows nearly everywhere in the CSA garden now. The resulting plants form giant rosette heads, a feat I have never been able to achieve sowing the seed.

The shell pea we grow is Green Arrow. I have been selecting and saving the seed for thirteen years. We like the snow pea and sugar snap pea more for your veggie shares, so we don’t raise more running feet of Green Arrow for seed, than for eating. The plants have lost none of their original vigor, and have become the foundation stock for Turtle Tree Seeds, the U.S biodynamic seed company.

This year we’re hoping to harvest seed for the first time from our Calabrese open-pollinated broccoli. We harvested florets when the main, hybrid varieties were not yet ready. Now, we’re letting them flower. The bees are ecstatic, for they adore Brassica nectar. I’m not sure what Broccoli honey tastes like, but they are gathering it with the same intensity they show toward the summer squashes.

Seed saving requires time and space, time to do the hand-work and space to separate varieties so they don’t cross-pollinate. Most seed companies are global, raising two crops a year by hybrid farming in South America in our winter. New, genetic modification of seeds (GMO’s) goes one step farther—gene-based controls make them proprietary. Some grain seed now contains what has been labeled a “terminator” gene. The seed cannot be saved and replanted, which will be devastating to peasant farmers in India and Africa. Other seeds are “mated” to a brand of herbicide or fungicide. The promise of this type of seed work is lessen the use of chemicals, but it also concentrates the availability of seed in the hands of one or two companies worldwide.

I hope that we will be able to do more seed saving in the years to come. Seeds can be moved from northern latitudes southward. A longer growing season guarantees time enough to form ripe seed. One has to take much more time—or use extra-ordinary season extenders—to grow a southern crop in Minnesota or North Dakota. Peanuts, anyone?

I took pictures this week for the newsletter with Rachel’s old digital camera. A neophyte with bifocals, I handed the camera to Andrea and, through some sleight-of-hand, transferred them to the soup building computer. She showed me how to resize them, but to be safe, I will attach them in a separate email.

Tomato Bruschetta
2 or 3 large tomatoes, diced
4 large basil leaves, sliced into ribbons
salt and pepper
12 slices French bread, sliced thin
3 cloves garlic, halved and crushed
¼ cup olive oil
Parmesan cheese or Feta cheese

Prepare a medium fire in a gas or charcoal grill, or preheat an oven broiler.
Combine tomatoes and basil in a bowl. Season with salt and pepper.
Toast bread over the fire or under the broiler until very lightly colored, but still soft. Rub one side of each slice with garlic.

Drizzle each slice with 1 Tablespoon olive oil. Using a slotted spoon, top each slice with a spoonful of tomato. Top with cheese and serve.

Sauteed Cherry Tomatoes
2 Tablespoons olive oil
4 cups cherry tomato halves
2 cloves garlic, minced
2 Tablespoons chopped fresh herbs
salt and pepper

Heat oil in a large skillet over medium heat. Add tomatoes and sauté until heated through, about 3 minutes. Add garlic and sauté until fragrant, 30 to 60 seconds. Remove from heat and add herbs. Season to taste with salt and pepper. Serve immediately.

Tomato Pesto Tarts
2 pounds tomatoes, cored and sliced ¼ inch thick
1 teaspoon salt
2 10-inch homemade or storebought pastry rounds
1 large egg, beaten
½ cup Parmesan cheese
½ cup pesto
½ cup grated mozzarella cheese

Cover a large work surface with a double layer of paper towels. Arrange tomato slices in a single layer on top of the towels. Sprinkle evenly with salt. Let stand 30 minutes.

Preheat oven to 375 degrees. Line a baking sheet with foil. Place pastry rounds on the baking sheet. Brush pastry with beaten egg, leaving a 2-inch border around the edges.
Sprinkle the Parmesan cheese onto both pastries. Spread pesto over that.

Place paper towels over the tomatoes and press firmly to dry. Arrange dried tomato slices on top of the pesto in overlapping circles. Sprinkle mozzarella on top.

Fold up the pastry edges and crimp. Bake 25 to 35 minutes, or until golden. Let stand 5 minutes. Cut into wedges.

Easy Homecanned Salsa
24 cups quartered ripe tomatoes
8 cloves garlic, peeled and left whole
2 cups white distilled vinegar
hot peppers to taste
2 onions, chopped finely
1 cup fresh green chile peppers, chopped finely
1 cup sweet bell pepper, chopped finely
salt

Combine tomatoes, garlic, vinegar and hot peppers in a large pot. Bring to a boil, reduce heat and simmer until tomatoes are very soft, stirring occasionally, about 45 minutes. Process through a food mill, discarding skins and seeds.

Return to your pot and add onions and peppers. Simmer until salsa has reduced to a nice, thick sauce, about 1 hour. Season with salt.

Ladle hot salsa into clean, hot pint jars, leaving ¼-inch headspace. Seal. Process in a boiling water bath for 15 minutes. Let cool undisturbed overnight. Store in a cool, dry place for up to one year.

Tomatillo, the Mexican husk tomato, is small and round, yellowish green like an unripe tomato. It is a native of Peru, was a staple in pre-Columbian cooking and is a member of the Solinacea family. The tomatillo is more closely related to the Gooseberry than the tomato. It is covered in a parchmentlike skin that peels off easily. The fruit can be used raw or cooked, and has flavors of green apple and lemon, with herbal, tart undertones. Cooking tempers the intensity of the flavor. The pulp is high in a pectin-like substance that acts as a natural thickener. Sauces made with tomatillos tend to thicken slightly when refrigerated.

Tomatillos keep for several weeks in the refrigerator. To prepare for cooking, remove the paper husks and rinse off the sticky residue on the skins. Finely diced or pureed raw toamtillos add a fresh, tangy, citrus-like flavor and are often used in Mexican dishes.

Blanched for 5 minutes, the flavor of the tomatillo becomes surprisingly mellow. Roasting under a broiler or grilling brings out more flavor. A recipe with tomatillos will require tasting and adjusting with sugar if the flavor is too tart.

Dry roasting produces a nutty flavor. Place tomatillos in a heavy cast-iron skillet. Turn heat to low. Roast for 20 to 30 minutes, turning occasionally, letting each side take on a rich, burnished gold color before turning.

My sister’s mother-in-law is from Mexico City. An expert cook, she shared her favorite tomatillo recipes with Caroline and me when I visited last May:

Tomatillo Salsa
4 tomatillos
1 jalapeno or serano pepper, seeded and deveined, then chopped
1 large clove garlic, chopped
10 shoots cilantro
oil

Whir cilantro and garlic in a food processor or blender. Add pepper.
Slice tomatillos. Heat a frying pan and add 1 Tablespoon oil. Add a single layer of tomatillo slices and fry on each side until flesh is golden brown and soft. Add to blender and repeat until all tomatillo slices are cooked. Add 1 to 2 Tablespoons water and blend until smooth. Serve with chips. Keeps several days in a sealed jar in the refrigerator.

Tomatillo green sauce
2 mild chile peppers
1 clove garlic, chopped
4 small tomatillos
oil

Slice tomatillos like tomatoes. Heat 1 Tablespoon oil in a frying pan. Arrange a single layer of tomatillo slices in pan and sauté until brown. Turn and cook until brown. Salt slices as they cook. Use a spatula to flatten end slices so they cook well. Put cooked slices into a blender.

Saute chile peppers and garlic in frying pan for 1 minute. Add to blender. Add ¼ to 1/3 cup water and a dash of salt. Blend until smooth. Strain if desired.

Mrs. Gasca recommends serving this sauce over warmed corn tortillas topped with strips of fresh basil and rounds of fresh mozzarella cheese.

Tomatillo and Avocado Dip

3/4 pound fresh tomatillos
4 large garlic cloves
3 ripe avocados
1/2 cup chopped fresh cilantro sprigs
1 1/2 tablespoons fresh lime juice, or to taste
4 tablespoons finely chopped red onion
Preparation
Remove husks and rinse tomatillos under warm water to remove stickiness. Heat a well-seasoned cast-iron skillet or griddle over moderately high heat until hot but not smoking and lightly brown tomatillos and garlic in spots all over (do not let burn). Transfer tomatillos and garlic to a plate and cool them to room temperature.
In a food processor, purée tomatillos and garlic until smooth. Halve and pit avocados and scoop into tomatillo mixture. Pulse until coarsely chopped. Stir in cilantro, lime juice, 3 tablespoons onion, and salt and pepper to taste. Garnish dip with remaining tablespoon chopped onion and serve with tortilla chips.

FYI for those following my daughter’s escapades: Rachel (producer), cinematographer Adam and writer/director Steve finished shooting their first feature film in New York City at the end of June. Now titled ‘Happy Birthday Rita,’ the very-low-budget (aka. guerilla) film is a bittersweet May-September love story about an older man unable to move on after his failed relationship with Rita. Each year he bribes a pizza deliveryman to help him celebrate her birthday. One day he inadvertently deletes her last message from his answer machine. Desperate, he hires a young, jaded, East European call girl to re-record Rita’s message. Drawn together by loneliness, they strike up a friendship that frees them to change their lives.

After recuperating from three months of 20-hour workdays, Rachel accepted a temporary job as Assistant Director on a short film to pay her student loans. As of Friday, she (and Adam and Steve) are in seclusion editing Happy Birthday Rita. Her MCAD teacher, Ali Selim (Sweetland), thinks they should enter it in Sundance Film Festival. That deadline is looming. Stay tuned. I am.

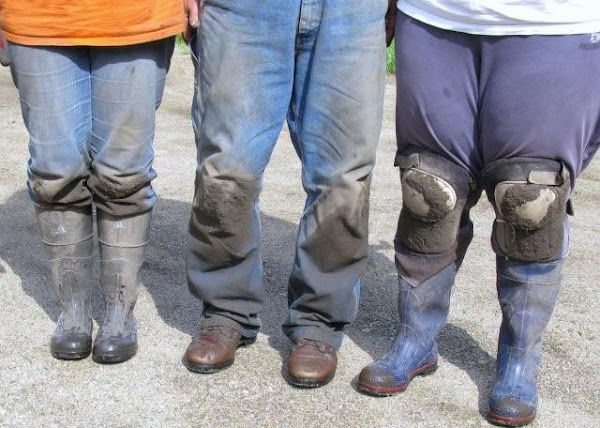
Six Dirty Knees

Six Dirty Knees